728x90
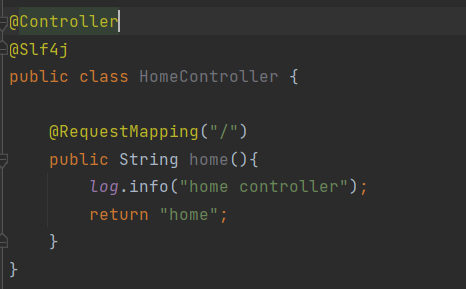
resource/template/home.html
<!DOCTYPE HTML>
<html xmlns:th="http://www.thymeleaf.org">
<head th:replace="fragments/header :: header"> <!-- import -->
    <title>Hello</title>
    <meta http-equiv="Content-Type" content="text/html; charset=UTF-8" />
</head>
<body>
<div class="container">
    <div th:replace="fragments/bodyHeader :: bodyHeader" />
    <div class="jumbotron">
        <h1>HELLO SHOP</h1>
        <p class="lead">회원 기능</p>
        <p>
            <a class="btn btn-lg btn-secondary" href="/members/new">회원 가입</a>
            <a class="btn btn-lg btn-secondary" href="/members">회원 목록</a>
        </p>
        <p class="lead">상품 기능</p>
        <p>
            <a class="btn btn-lg btn-dark" href="/items/new">상품 등록</a>
            <a class="btn btn-lg btn-dark" href="/items">상품 목록</a>
        </p>
        <p class="lead">주문 기능</p>
        <p>
            <a class="btn btn-lg btn-info" href="/order">상품 주문</a>
            <a class="btn btn-lg btn-info" href="/orders">주문 내역</a>
        </p>
    </div>
    <div th:replace="fragments/footer :: footer" />
</div> <!-- /container -->
</body>
</html>- 홈 화면 연결하기
include가 되어있는, fragments의 header, bodyHeader, footer 파일을 생성해야 한다.
header.html
<!DOCTYPE html>
<html xmlns:th="http://www.thymeleaf.org">
<head th:fragment="header">
    <!-- Required meta tags -->
    <meta charset="utf-8">
    <meta name="viewport" content="width=device-width, initial-scale=1, shrinkto-fit=no">
    <!-- Bootstrap CSS -->
    <link rel="stylesheet" href="/css/bootstrap.min.css" integrity="sha384-
ggOyR0iXCbMQv3Xipma34MD+dH/1fQ784/j6cY/iJTQUOhcWr7x9JvoRxT2MZw1T"
          crossorigin="anonymous">
    <!-- Custom styles for this template -->
    <link href="/css/jumbotron-narrow.css" rel="stylesheet">
    <title>Hello, world!</title>
</head>
bodyHeader.html
<!DOCTYPE html>
<html xmlns:th="http://www.thymeleaf.org">
<div class="header" th:fragment="bodyHeader">
    <ul class="nav nav-pills pull-right">
        <li><a href="/">Home</a></li>
    </ul>
    <a href="/"><h3 class="text-muted">HELLO SHOP</h3></a>
</div>
footer.html
<!DOCTYPE html>
<html xmlns:th="http://www.thymeleaf.org">
<div class="footer" th:fragment="footer">
<p>© Hello Shop V2</p>
</div>
- 현재는 include 스타일의 구조를 사용하여 HTML을 렌더링 할 때마다 중복되는 코드를 포함하는 스타일로 하였지만 Thymeleaf 공식 문서에 보면 계층형 구조로 중복되는 코드를 제거하는 방식도 존재
- CSS와 JS 파일 같은 경우 BootStrap을 다운로드한 뒤, resources/static 아래에 붙이기

/* Space out content a bit */
body {
 padding-top: 20px;
 padding-bottom: 20px;
}
/* Everything but the jumbotron gets side spacing for mobile first views */
.header,
.marketing,
.footer {
 padding-left: 15px;
 padding-right: 15px;
}
/* Custom page header */
.header {
 border-bottom: 1px solid #e5e5e5;
}
/* Make the masthead heading the same height as the navigation */
.header h3 {
 margin-top: 0;
 margin-bottom: 0;
 line-height: 40px;
 padding-bottom: 19px;
}
/* Custom page footer */
.footer {
 padding-top: 19px;
 color: #777;
 border-top: 1px solid #e5e5e5;
}
/* Customize container */
@media (min-width: 768px) {
 .container {
 max-width: 730px;
 }
}
.container-narrow > hr {
 margin: 30px 0;
}
/* Main marketing message and sign up button */
.jumbotron {
 text-align: center;
 border-bottom: 1px solid #e5e5e5;
}
.jumbotron .btn {
 font-size: 21px;
 padding: 14px 24px;
}
/* Supporting marketing content */
.marketing {
 margin: 40px 0;
}
.marketing p + h4 {
 margin-top: 28px;
}
/* Responsive: Portrait tablets and up */
@media screen and (min-width: 768px) {
 /* Remove the padding we set earlier */
 .header,
 .marketing,
 .footer {
 padding-left: 0;
 padding-right: 0;
 }
 /* Space out the masthead */
 .header {
 margin-bottom: 30px;
 }
 /* Remove the bottom border on the jumbotron for visual effect */
 .jumbotron {
 border-bottom: 0;
 }
}- css 파일 아래 jumbotron-narrow.css 파일 생성 후 코드 붙이기
728x90
'실전! 스프링 부트와 JPA 활용1(웹 애플리케이션 개발)' 카테고리의 다른 글
| Ch07. 웹 계층 개발 - 회원 목록 조회 (0) | 2021.12.07 |
|---|---|
| Ch07. 웹 계층 개발 - 회원 등록 (0) | 2021.12.07 |
| Ch06. 상품 도메인 개발 - 주문 검색 기능 개발 (0) | 2021.12.06 |
| Ch06. 상품 도메인 개발 - 주문 기능 테스트 (0) | 2021.12.06 |
| Ch06. 상품 도메인 개발 - 주문 Repository 개발, 주문 Service 개발 (0) | 2021.12.06 |