728x90
- 함수형 컴포넌트로 이벤트 구현
-
e.target.name을 활용하지 않고 onchange관련 함수 두 개를 따로 만들어 주었다import React, { Component } from "react"; import { useState } from "react/cjs/react.development"; const EventPracticeClass = () => { const [username, setUsername] = useState(""); const [message, setMessage] = useState(""); const onChangeUsername = (e) => setUsername(e.target.value); const onChangeMessage = (e) => setMessage(e.target.value); //onchange함수 두개를 따로 만들어 주었다. const onClick = () => { alert(username + ": " + message); setUsername(""); setMessage(""); }; const onKeyPress = (e) => { if (e.key === "Enter") { onClick(); } }; return ( <div> <input type="text" name="username" placeholder="사용자명" value={username} onChange={onChangeUsername} /> <input type="text" name="message" placeholder="아무거나 입력해 주세요" value={message} onChange={onChangeMessage} onKeyPress={onKeyPress} /> <button onClick={onClick}>확인</button> </div> ); }; export default EventPracticeClass; - UseState을 객체를 받도록 변환

State 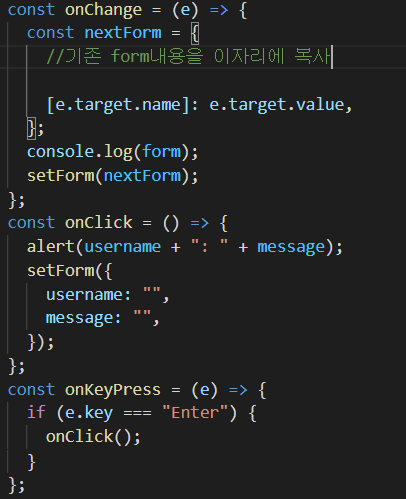

이벤트 연결
728x90
'리액트 > 이벤트핸들링' 카테고리의 다른 글
| ch05.Input 여러 개 다루기,OnKeyPress 이벤트 핸들링 (0) | 2021.08.10 |
|---|---|
| ch04.임의 메소드 만들기 (0) | 2021.08.10 |
| ch03.onChange 이벤트 설정 (0) | 2021.08.02 |
| ch02.예제로 이벤트 핸들링 익히기 (0) | 2021.08.02 |
| ch01.리액트의 이벤트 시스템 (0) | 2021.08.02 |